New customer? New to the industry? Just starting out in business?
You can be assured that with Betterbounce, you are in experienced hands. Our brand has been operating in the inflatable industry for over 30 years and we have encountered virtually every scenario possible. Additionally, our associated hire company is one of the largest in the country, adding to our wealth of experience. Our technical staff from both companies are available to assist you 7 days a week and 365 days a year. You can visit our hire company's website at www.fun-bounce.co.uk.
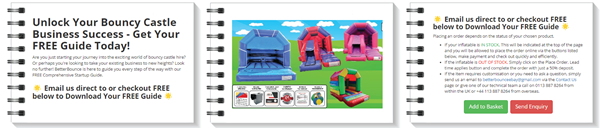
As a Betterbounce customer, we provide you with a comprehensive suite of tools to support the success of your business. This includes directory listings for your bouncy castles, discount vouchers, administrative paperwork, and web design assistance and guidance. We also provide bouncy castle hire agreements, risk assessments, and a wide range of other valuable information to help get your business up and running as soon as possible

Getting started with your freebies couldn't be easier. All we ask is that you complete the details at the the bottom of your paperwork when you receive your inflatables and return them to us at your convenience.
You will receive all of the following;
Yellow pages: Your listing will be uploaded onto the yellow pages database as soon as we receive your information and should go live on their system shortly after & live in the book during the next circulation for your area. You may receive a verification call to the number you have given us shortly.
Google Search Engine: Your listing will be uploaded onto the Google database as soon as we receive your information. Google unfortunately are a law to themselves and although registration is instant on our part, listings can take anything from 30 days to 12 months depending on the quality and background information contained within your website.
Bing Search Engine: Your listing will be uploaded onto the Binge database as soon as we receive your information. Bing seem more efficient than Google but listings can take anything from 10 days to 8 months depending on the quality and background information contained within your website.
UK Hire Directory: Your listing will be uploaded onto the UK Hire directory database as soon as we receive your information. Updating of this system is done every 10 days.
FREE 50 Page guide on how to run and operate a bouncy castle hire company:
The 50 page guide is available in PDF format and can be emailed direct to you on request. The 50 page guide is a fantastic way to kick start your business today. The guide will talk you through various aspects of the hire business and guide you through the following;
- Buying your 1st bouncy castle
- What extra equipment you need to compliment your hire company
- Delivery vehicle
- Trade associations and gaining industry allies
- Advertising strategies
- Insurance, Risk assessments, Method statements and general health and safety of inflatables
- Example administrative paperwork from invoices to disclaimers
- Delivery and maintenance paperwork
- Corporate work and expanding your business
- Setting up, collecting and maintaining your inflatables
- Accidents, Health and safety
- Bouncy castles repairs and testing.
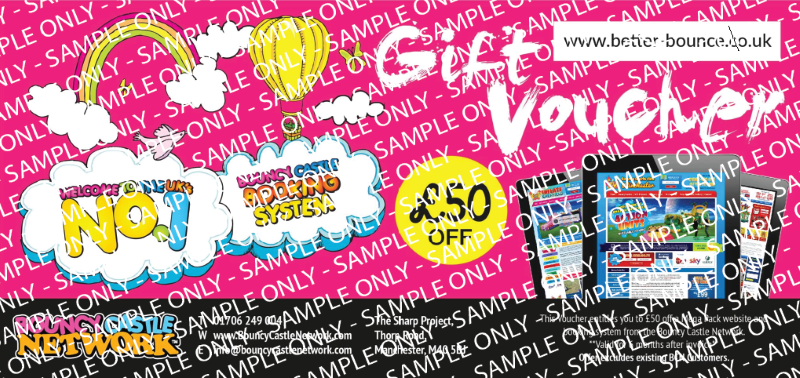
FREE £50 Discount voucher for the bouncy castle network: Simply contact the bouncy castle network and quote the reference number from the voucher below to see what he can do for your business. *new customers only & only valid against top package subscription.
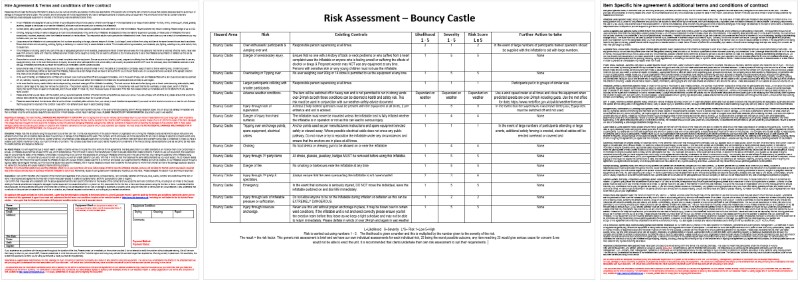
Hire agreement & Risk Assessment template: As part of becoming a Betterbounce customer, We will supply you with a free hire agreement template & Risk assessment to help get you started. (see example below)
Safe operations guide - Important! Please read this document before inflating your inflatable.
Please familiarise yourself with the contents of this document before attempting to use your new inflatable. This is necessary for the safe operation of the product and to ensure reliable service from it. The advice contained in this document should be read in conjunction with THE European standard document EN14960. This is available from HSE Books PO Box 1999, Sudbury, and Suffolk and on the web at www.hse.gov.uk.
It is the responsibility of the owner to ensure all persons setting up, using/supervising or taking down this play inflatable are conversant with the contents of this manual. Better Bounce Direct Ltd do not accept any liability whatsoever from injury, damage or other claim resulting from the use of the product and our liability is limited to the manufacturing process. This product is HEAVY and suitable assistance should be deployed to ensure that it is handled safely. We do not recommend that one person carry it under any circumstances.
Setting up - If using a separate ground sheet (recommended), place and secure this on the surface on to which the inflatable is to be erected.
- With assistance, roll out the inflatable; ensuring the blower pipe is at the rear.
- Open out the Inflatable, which will have been folded into a third of its size for transportation purposes, by pulling on the nylon webbing anchor points.
- Once the inflatable is in the desired position, use the steel anchor stakes to secure it to the ground. The anchor loops should be left with a little play but the stakes should be driven fully home and be level with the surface. The unit may require re positioning once inflated.
- Next, pull the blower pipe straight and place the fan behind the pipe. Stretch the blower tube over the funnel of the fan as far as it will go and secure in place by tying with the nylon rope that was provided with the inflatable. NOTE: The fan should be placed on a dry and level surface to ensure stability and reduce the chance of moisture affecting the device. Make sure no litter. This could foul the fan intake vent.
- Using a suitable extension cable, connect the fan to a 230V domestic electricity supply using a plug-in RCD safety device (not provided). This device is essential to safeguard against electrical shock (as with all devices used outdoors, such as strimmers, lawnmowers, water pumps etc.) DO NOT USE WITHOUT THIS DEVICE IN PLACE AS THE FAN IS POWERED BY MAINS VOLTAGE.
- Ensuring you have a view of the inflatable, turn on the power. Do not let anyone stand on the inflatable until it is fully erect. This should only take about one minute.
- The fan should be left running all the time that the inflatable is in use. This is a continuous pressure device Air is forced into the inflatable by the fan and then slowly escapes from the tens of thousands of needle holes produced during manufacture. When the inflatable is used excess capacity of air is exhausted via a valve in the fan and the “Bounciness” and shape of the structure is maintained. The fan is designed to maintain the necessary volume of air entering the structure. It cannot be over inflated if the correct fan is used.
Safe use - Important. Please read this document before using your product. Please be aware of the following rules for the safe use of your equipment.
- This unit is designed for use by children of up to 65kgs Unless specified specifically for Adult Use.
- No food or drinks or chewing gum to be allowed on or near the Inflatable. This will avoid choking and mess.
- All shoes, glasses, jewellery, badges MUST be removed before using this Inflatable.
- No face paints, party poppers, coloured streamers or silly string to be used either on or near the Inflatable.
- No smoking or barbecues near the Inflatable.
- Climbing, hanging or sitting on walls is DANGEROUS and must not be allowed.
- A responsible Adult must supervise the Inflatable at all times, Always ensuring that the Inflatable is not overcrowded, and limit numbers according to the age, size and stature of children using it. Try to avoid large and small children from using it at the same time.
- Ensure that children are not pushing, colliding, fighting or behaving in a manner likely to injure or cause distress to others.
- No pets, toys or sharp instruments are allowed on or near the Inflatable.
- If the Inflatable is not being used for any part of the day, please switch the fan off at the mains.
- Do not allow anyone to bounce on the front safety step as a child could easily bounce off the inflatable and get hurt. The step is there to assist users in getting on or off only.
- Ensure that no one with a history of back or neck problems or who suffers from a heart complaint uses the Inflatable or anyone who is feeling unwell or suffering the effects of alcohol or drugs.
- Do not allow anyone to be on the Inflatable during inflation or deflation as this is DANGEROUS.
- Ensure that Children are not attempting somersaults and are clothed appropriately and that nothing can fall out of their pockets.
- Ensure that an area around the unit is completely clear as stated EN14960.
- The Inflatable must not be used if it becomes wet. If no shower cover is fitted, In the event of rain, the unit should not be used.
- In the event of heavy rain, it is strongly recommended that the Inflatable be switched off. Any wetness, can be dried with a towel.
- In the event that the fan stops working, ensure all users get off the inflatable immediately.
- As stated above, the fan should be connected via a RCD device at the power supply. Try pressing this to reset it, also check the fuses and make sure the blower tube or deflation tube has not come undone or something has not blown onto and is obstructing the fan intake.
- In the event that the fan overheats, or loses power, switch it off at the mains, and then switch it back on again 5 minutes later, and it should restart. If it does not, check supply as in paragraph 20.
- Never use this unit without proper anchorage in place on each and every anchor point, it could blow away in the wind, topple over or detach the fan etc.
- If using indoors ensure sufficient height clearance so that no part of the structure fouls the ceiling, light fittings other obstructions.
- If using indoors or on solid surfaces, anchor in place using substantial sandbags or other heavy weights to stop movement.
- Do not modify or alter the unit in anyway - To do so will invalidate warrant.
- Do not have this unit repaired by anyone else - This will invalidate the warranty and we will REFUSE to carry our further repairs.
- Do not apply any paint or transfers to the unit - This will invalidate the warranty.
- This Inflatable should only be cleaned using mildly soapy water and then thoroughly rinsed. Attaching the blower and leaving it to run will help to dry it out. This may cause the unit to “Bubble”. This is normal and excess water should be removed using a dry towel or similar no abrasive and absorbent material. DO NOT STORE WHEN WET If it is necessary to leave the inflatable in a wet condition, do not leave it that way for long and wash/dry off as soon as the weather or use of suitable indoor facilities permits. Failure to adhere to this WILL RUIN YOUR INFLATABLE PERMANENTLY
Deflating and packing - IMPORTANT – PLEASE READ BEFORE DEFLATING YOUR PRODUCT
The following instructions refer to an 11 x 15 roofed castle but the basic principles will apply to all inflatable units.
- To deflate the unit, turn off the fan by removing plug from power outlet and disconnect the blower pipe from the fan. NOTE: No person should be on the unit at this time. If left for around 5 minutes (perhaps whilst the anchor stakes are removed), the unit will fully deflate itself.
- Fold rear arch and front arch towards the centre of the castle bed, laying them flat as possible.
- Next fold the sidewalls towards the centre, laying them flat onto the arches.
- Using the anchor loops, pull one side of the castle towards the centre (to lie on top of the side walls) until only 1/3 of the opposite side is visible. Then do the same with the other side. In this way you should have folded the castle into 1/3 of its normal footprint.
- Commencing at the step end, roll the castle up tightly, as you would a sleeping bag. This normally requires two people. Continue to roll the castle, expelling excess air as you go, until the blower pipe is reached.
- Unroll the castle again and repeat step 6. This time, stop slightly before the end and tuck the blower pipe inside and roll on a few more turns to secure.
- Finally using the rope provided, place a length under the castle and tie up as it arrived from the factory.
- These are the best instructions that it is possible to give in written form. Most users develop their own technique through experience.
We hope this helps for now and if you need to ask any questions, simply send us an email to info@better-bounce.co.uk via the CONTACT US page or give one of our technical team a call on the numbers below: